

Advice & Care
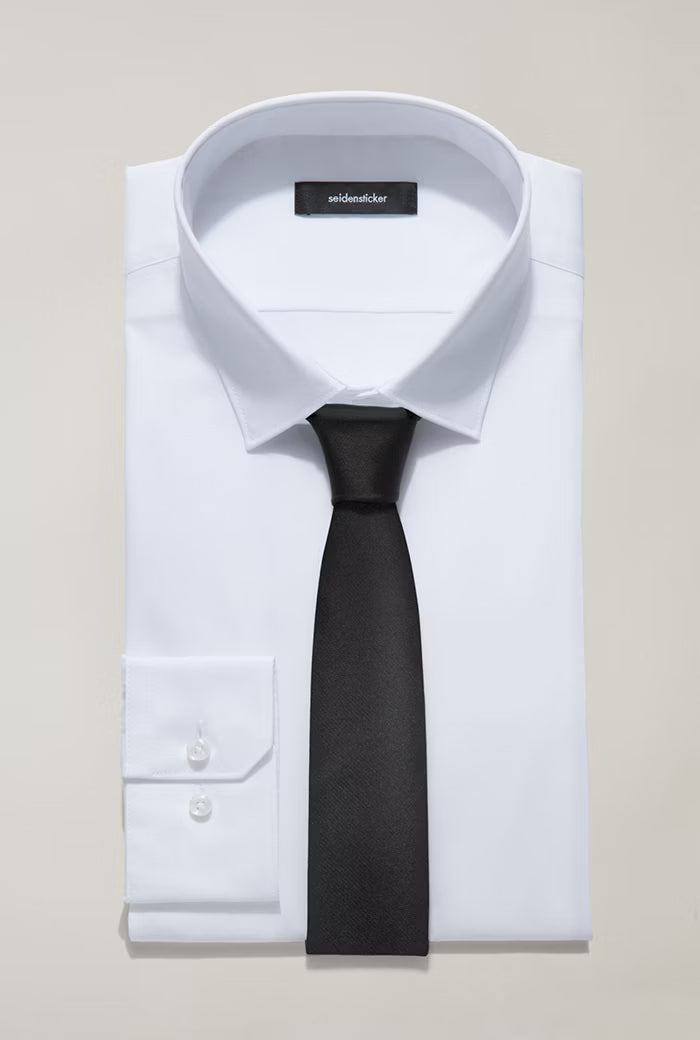
Finding a shirt that fits you perfectly and teaming it with the right suit and a matching tie – that’s just one half of the battle. The other half is putting the outfit together to create an exceptionally stylish look. Here, the devil’s in the details. Everything must be well-coordinated – from the perfect knot in your tie, to the correctly-folded pocket square, to the proper provision of care for your outfit. Which tie knots suit which shirt, when to fold your pocket square, and how to provide the best care possible for your shirt – discover tips and tricks surrounding these topics and more in our Seidensticker Service Guide.

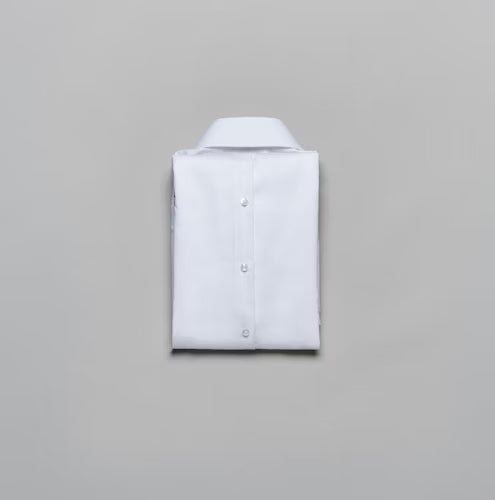
Folding a shirt
Seidensticker shirts are easy-care, crease-resistant and thus ideal for all your day-to-day business activities. To ensure that your shirt is ready to go when you are, you should store it on a hanger after washing. When out and about or travelling, simply fold it up and put it in your suitcase. To make sure that your shirt gets to where it needs to go without any creases, there are a few tips and tricks you should take note of when folding it. Step by step, the following guide will show you how to fold your shirt correctly.
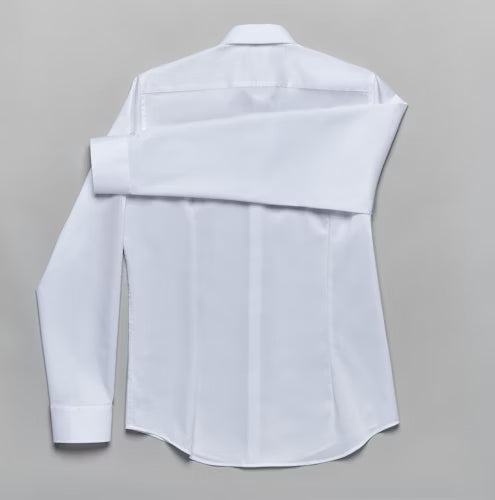
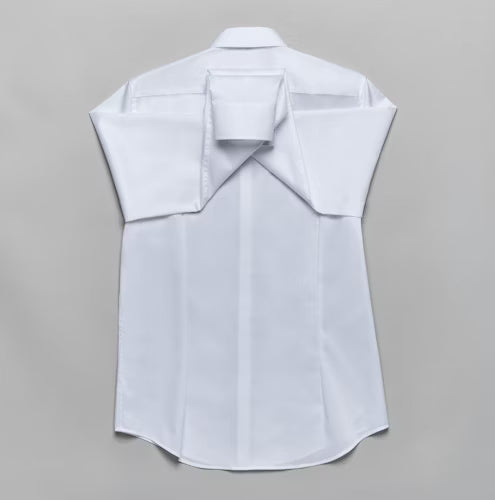
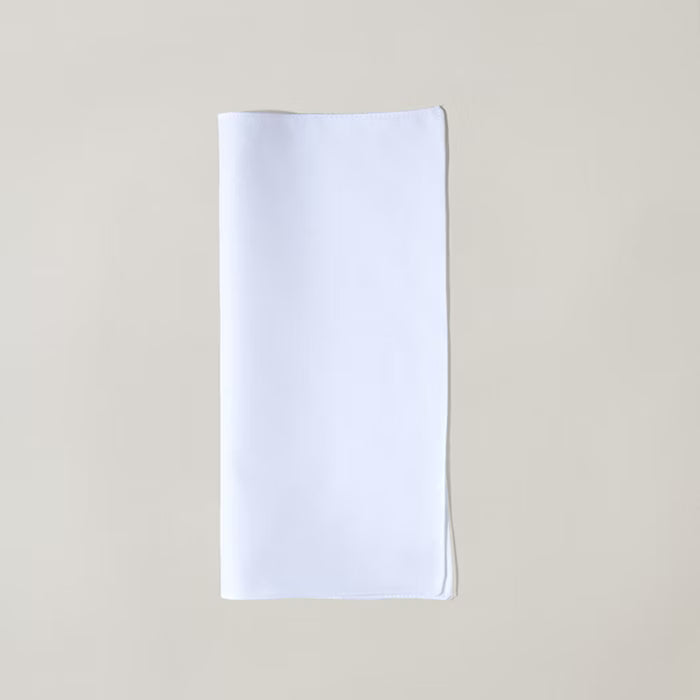
Place the shirt in position and smooth it flat
Button the shirt completely and lay it on a hard, flat surface (e.g. a table) with the front facing down. Following this, carefully smooth the shirt flat again and fold the right-hand sleeve to the left so that it crosses the back of the shirt.
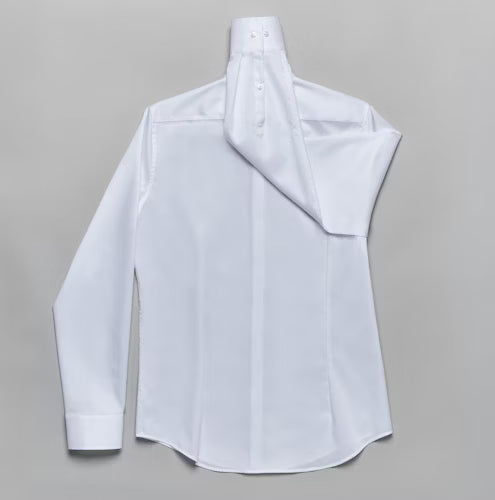
Fold the right-hand sleeve upwards
Taking the approximate middle of the right-hand sleeve as a starting point, fold the sleeve upwards so that the cuff sits centrally above the collar of the shirt.
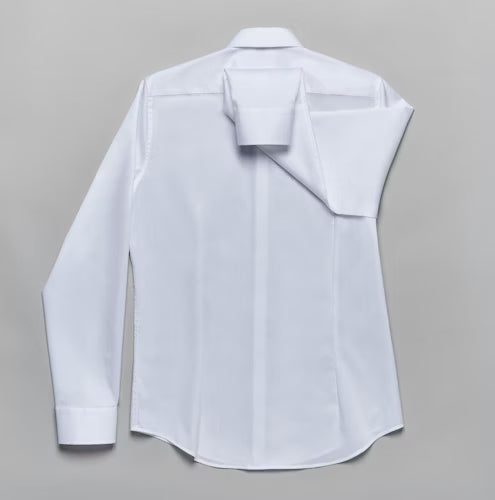
Fold the cuff downwards
Now fold the cuff downwards so that it finishes on a level with the diagonal lower edge of the right-hand sleeve.
Fold the left-hand sleeve
Do exactly the same thing with the left-hand sleeve, finishing with the left cuff on top of the right cuff.
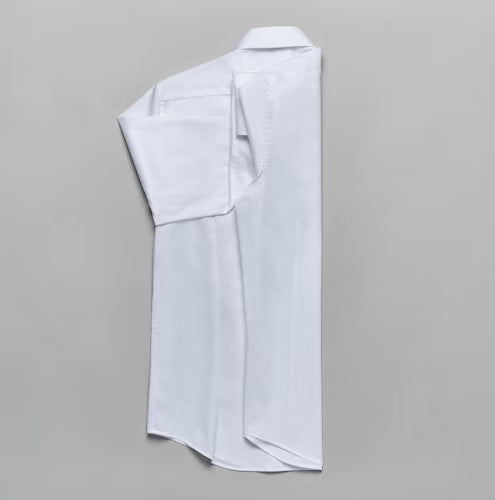
Fold the right-hand side to the left
Fold the right-hand side of the shirt to the left. Helpful tip: if you look at the top of the shirt, the fold should be level with the right-hand edge of the collar.
Fold the left-hand side to the right
Fold the left-hand side of the shirt to the right so that the left-hand side of the shirt rests on top of the right-hand side.
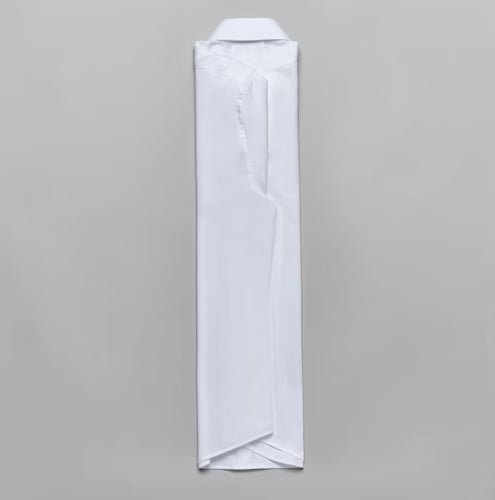
Fold the lower half upwards
Fold the lower half of the shirt upwards so that the lower edge sits in the middle of the shirt.
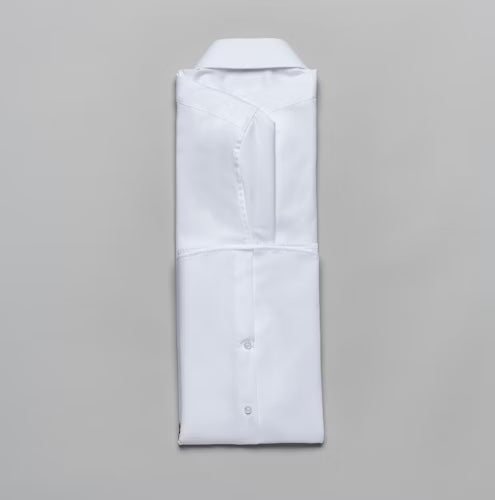
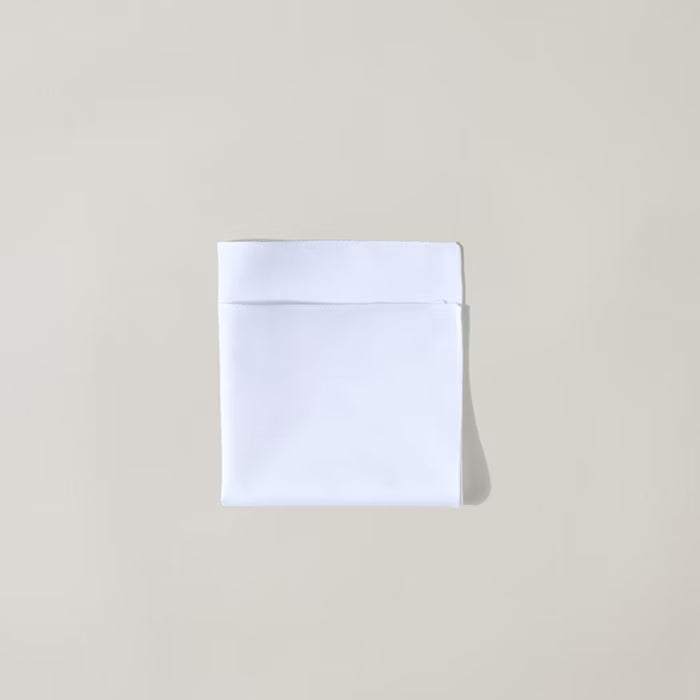
Fold the bottom half of the shirt up to meet the top half
Fold the bottom half of the shirt up to meet the top half in such a way that the edge of the shirt touches the lower edge of the collar.
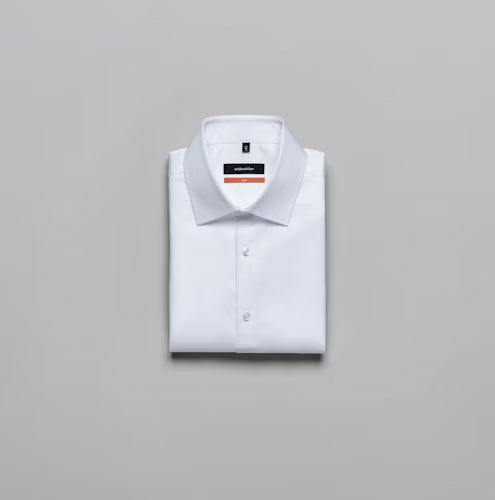
Turn over and you're done
Now all you have to do is turn the shirt over carefully and place it in your suitcase or wardrobe. Finished!
Folding a pocket square
Small detail, big impact: the pocket square, also known as a pochette, adds a stylish and elegant touch to any outfit and is a traditional male accessory which has remained in style for hundreds of years. At the same time, it’s not an accessory which is only to be brought out at celebrations and formal events; it also adds a finishing touch to any smart business look. No matter whether it’s made from silk or linen, whether it’s plain or striped, it’s not only the material, colour and pattern of your pocket square that are crucial when it comes to creating the perfectly put-together overall look – the correct folding technique also plays a key role.
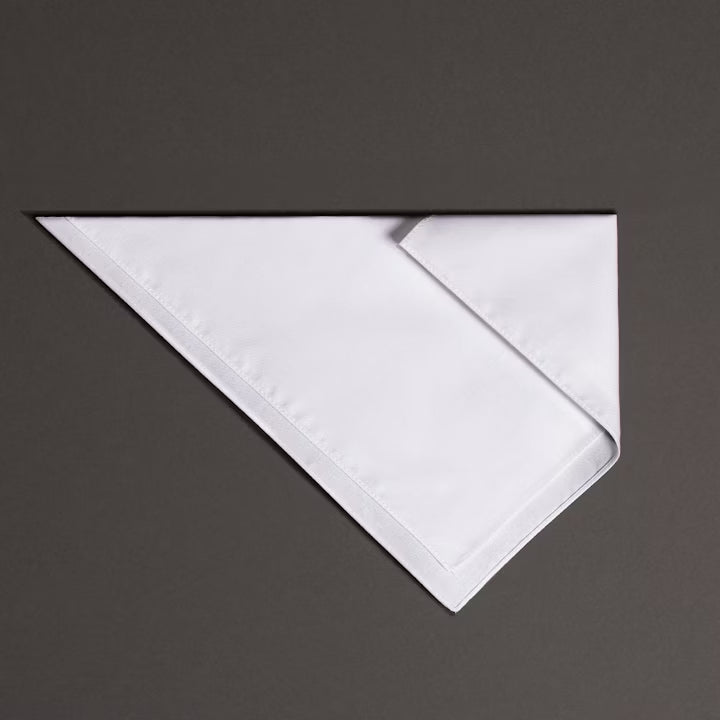
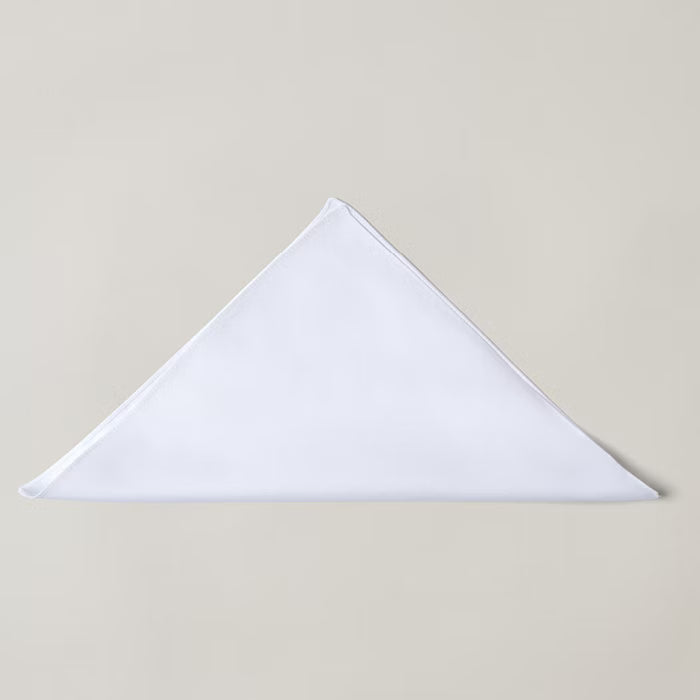
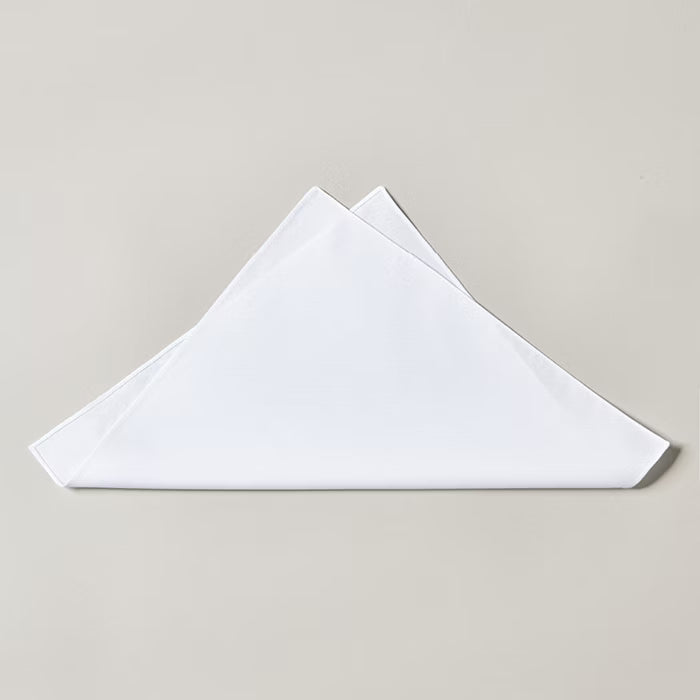
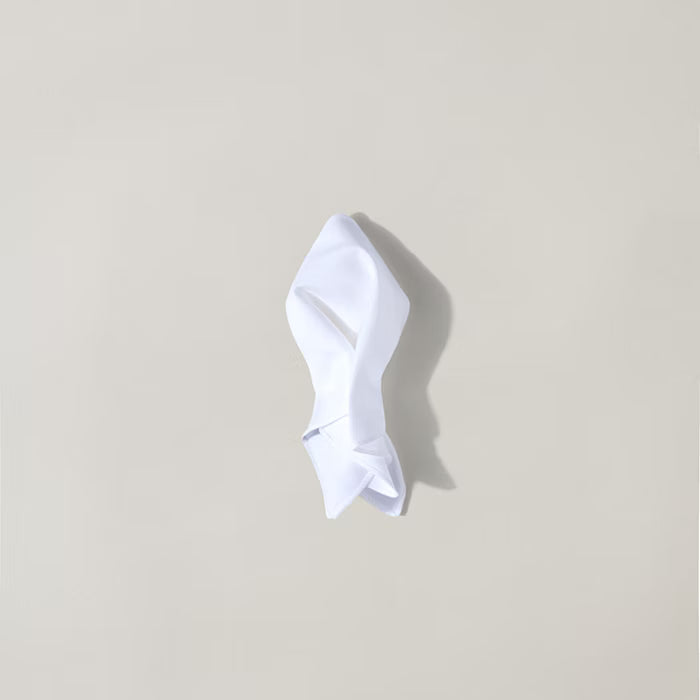
The square fold
Simple and elegant. The square fold – also called the presidential fold – is the classic fold for pocket squares. The best part about it? It’s also the simplest fold. These advantages make the flat pocket square particularly well-suited to business applications. Do you need to give your suit a quick update in the looks department before an important meeting with a customer? The square fold does the job in no time. This classic folding technique is particularly well-suited to monochrome pochettes, preferably in white.
Lay the handkerchief face down
Fold the pocket square in the middle.
Now fold the upper part of the handkerchief downwards. If your breast pocket is too small, you call also fold the handkerchief three times.
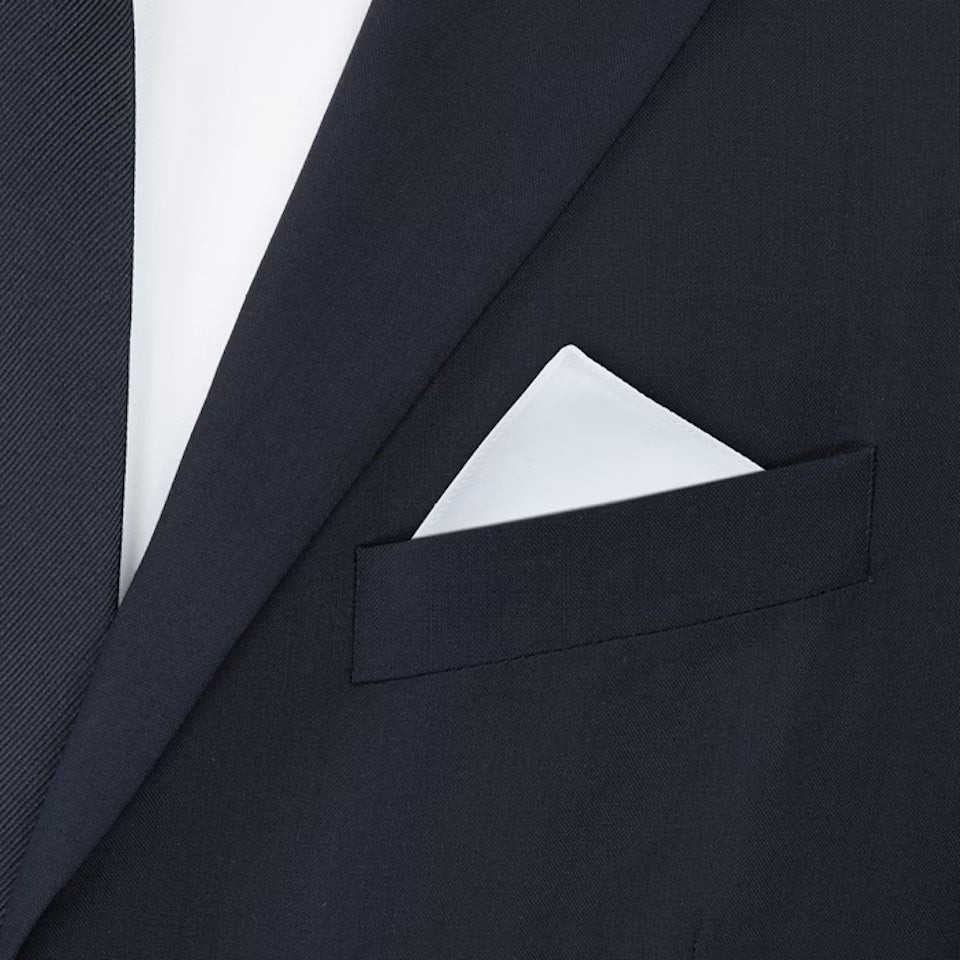
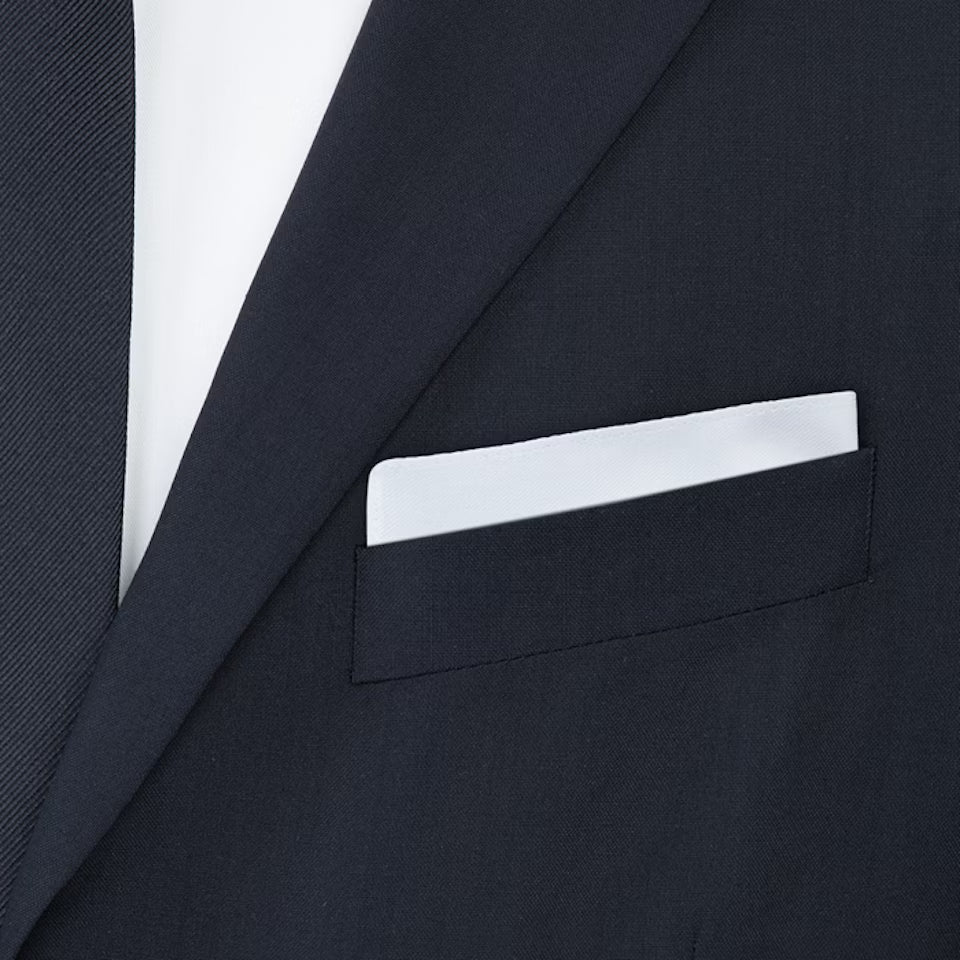
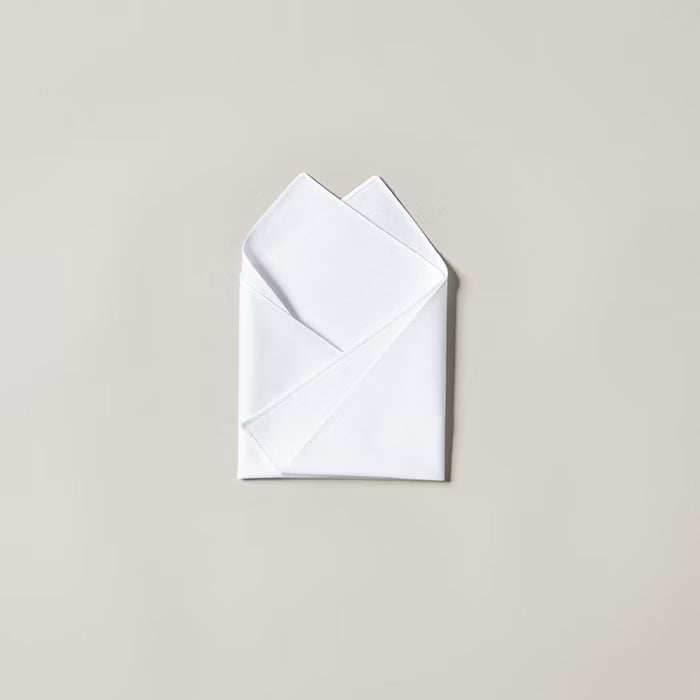
The triangular fold
One corner up
Slightly more elegant than the square fold – and almost just as easy to fold. The triangular fold is the fold of choice for formal and festive events. At the same time, it is also subtle enough for a classic business outfit. Going straight from the office to the opera or an upmarket restaurant? If, in these cases, you fall back on the one corner up fold, you only have to fold once. The triangular fold can be adapted to fit any width of breast pocket and works best on fine, smooth silk handkerchiefs.

Place your pocket square on a clean, flat surface
Make a triangle by folding your handkerchief in half
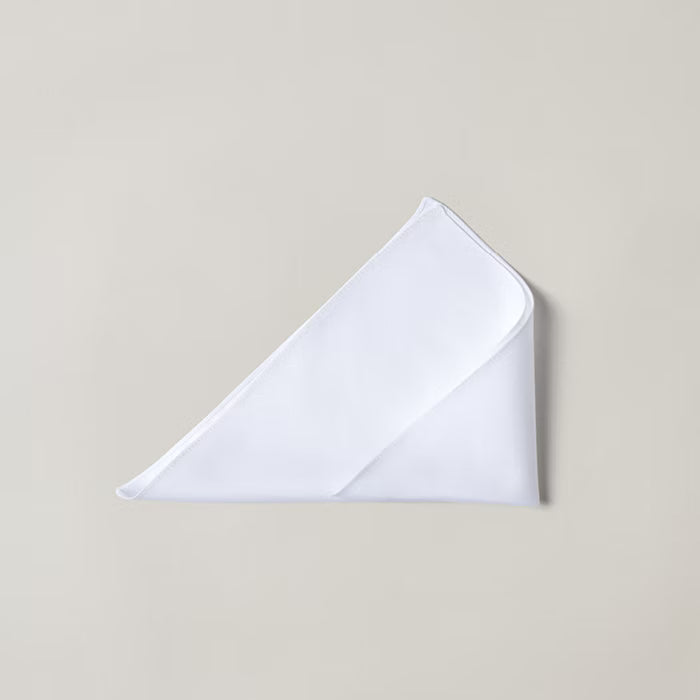
Fold one corner inwards and make a clear-cut fold by running your hand over the fabric
Repeat with the other corner. Place the handkerchief in your breast pocket and adjust until the pocket square sits as it should
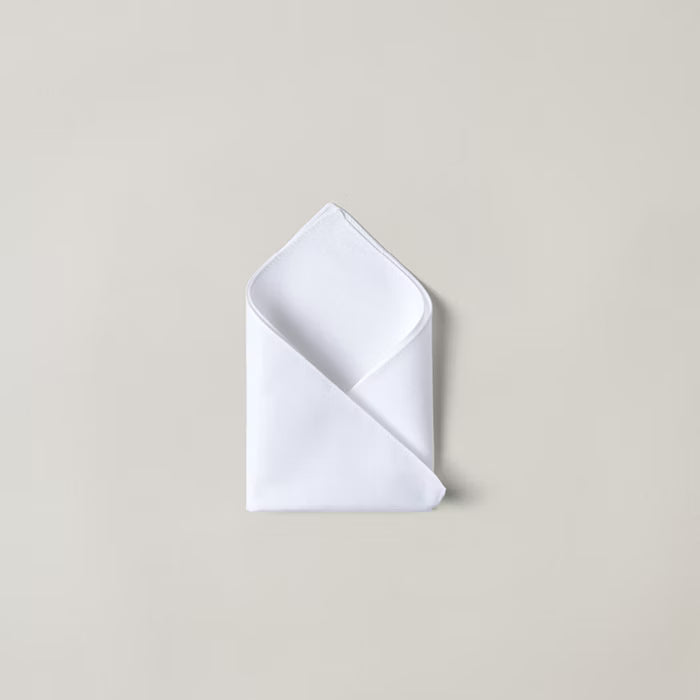
The double triangular fold
Two corner up
Double the hold. Double the impact. Try the double triangular fold and see for yourself. The two corner up fold allows the pochette to keep its shape in your breast pocket for much longer than more simple folds. This folding technique gives off a sporty yet elegant impression and is a fantastic addition to casual outfits. The two corner up fold really hits the mark, even in the combination of sports jacket, jeans and pocket square.

Place your pocket square on a clean, flat surface.

Fold your handkerchief in half slightly off-centre, making two triangles
Then fold one corner inwards
Following this, fold the other corner inwards. Place the handkerchief in your breast pocket and adjust until your pocket square sits as it should
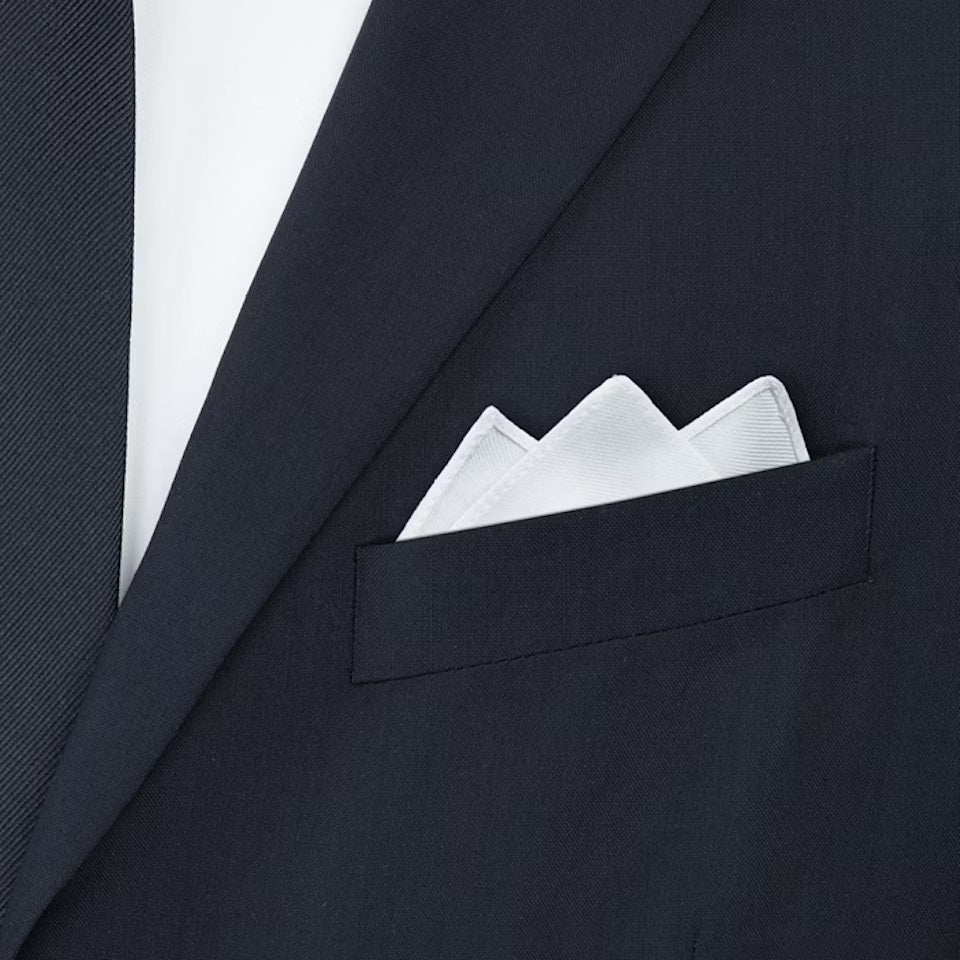
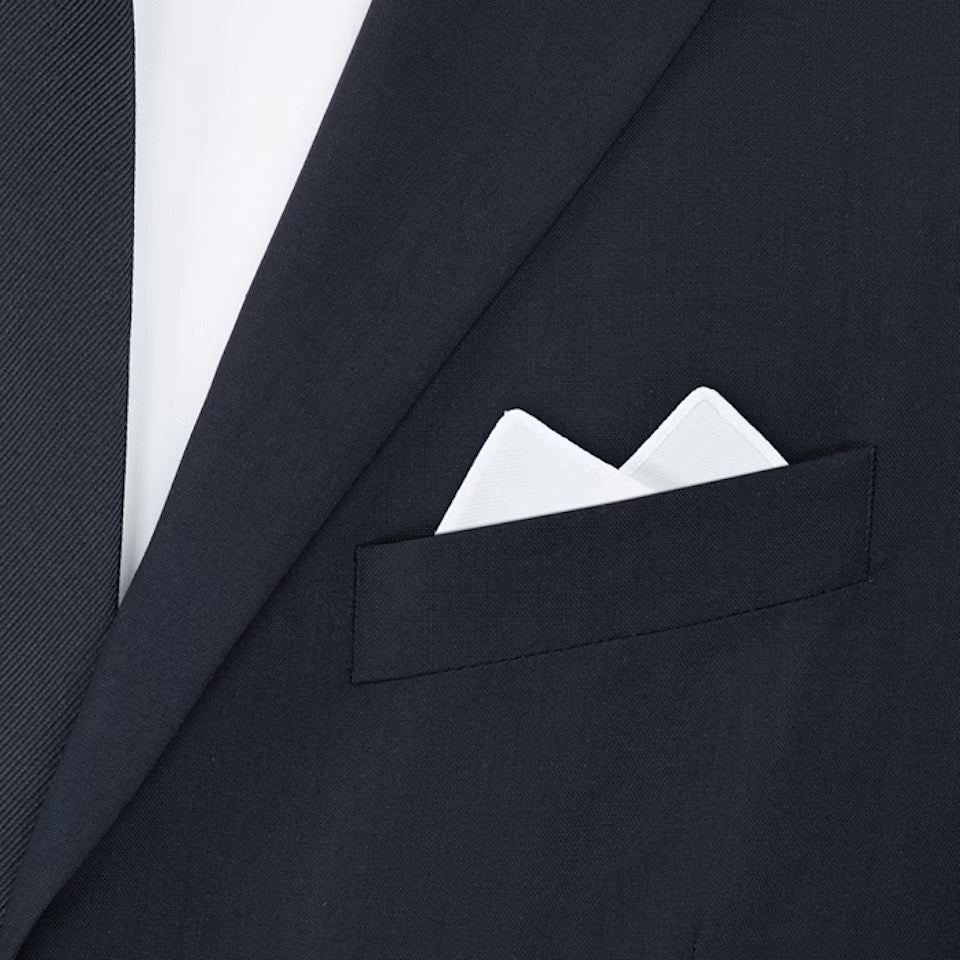
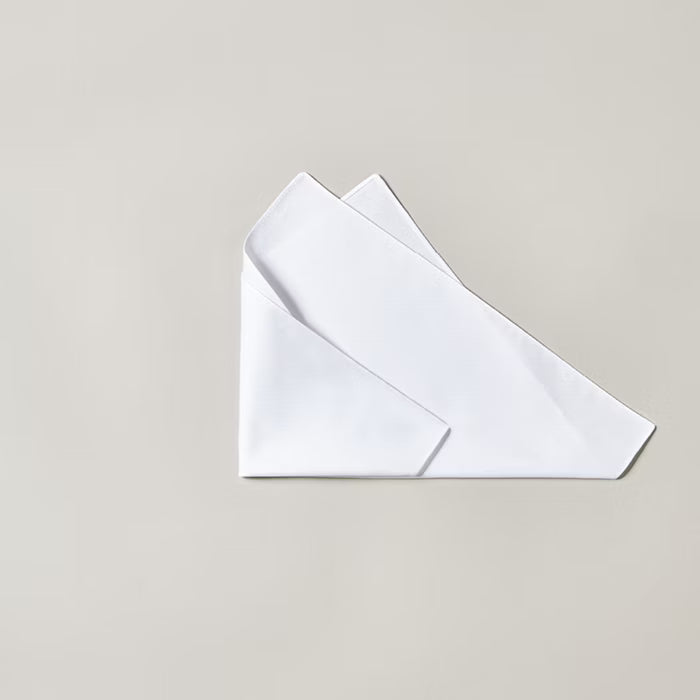
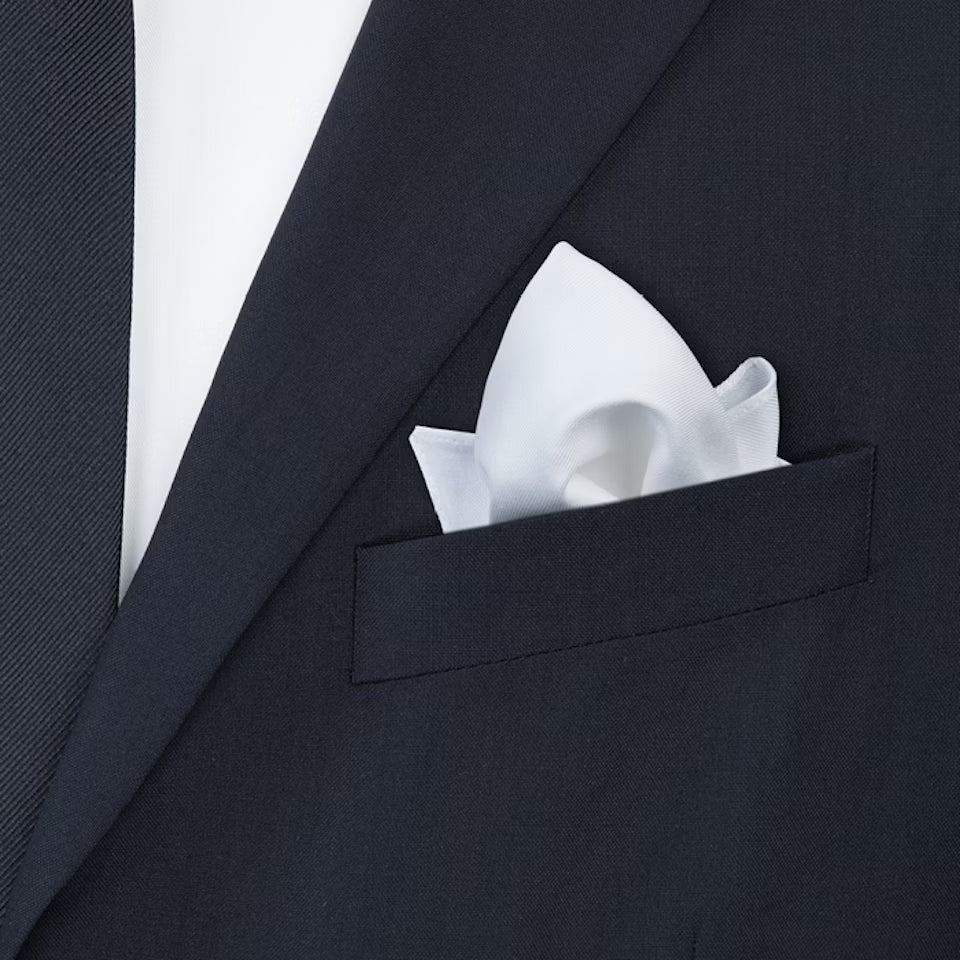
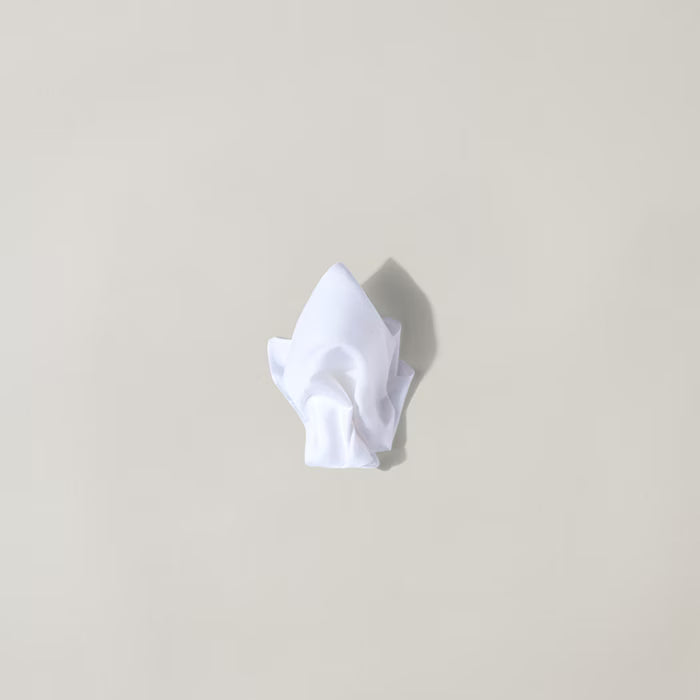
The crown fold
Three corner up
The most elegant way to fold a pochette. The three corner up fold creates a pocket square in the shape of a three-pointed crown – the perfect fold for formal and festive events. However, a standard “fold it and go” approach simply will not do for the crown fold. This particularly elegant and exclusive technique requires a bit of practice. However, it’s more than worth the effort. The three corner up adds a regal finishing touch to your elegant evening attire.
Place your pocket square on a clean, flat surface.
Fold your pochette in two to make two overlapping triangles
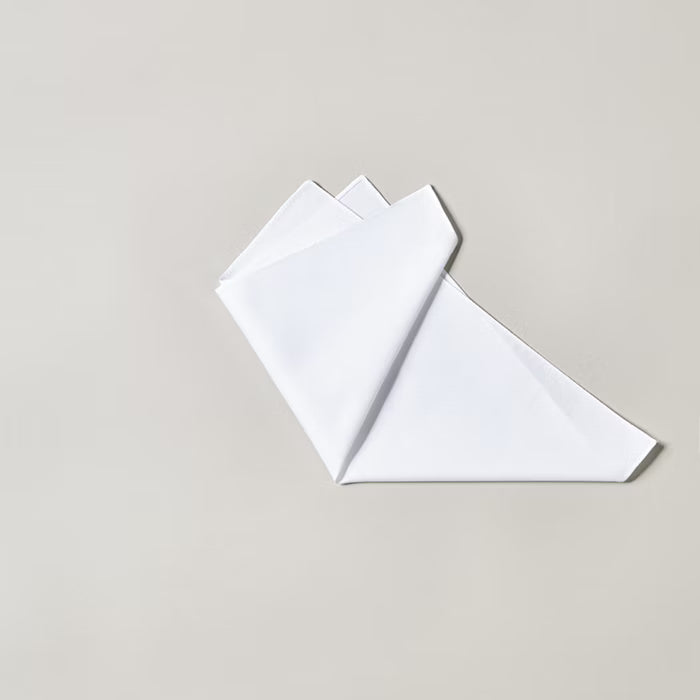
Fold one point of the triangle diagonally upwards in order to make a third point

Fold the right-hand corner inwards in order to create a flat base. Carefully place the pocket square in your breast pocket and adjust until the handkerchief sits as it should
The puff fold
Casual Fold
The most easy-going way to wear a pocket square. The aim of the puff fold is to make the pochette look almost as if it was placed in the breast pocket at random. However, take a look behind the scenes of this casual look and you will find a relatively complicated folding process which works particularly well on thin, silk handkerchiefs. Picture the casual elegance of classic Hollywood stars from the 50s and 60s and you will have some idea of the effect that can be created by a pochette with a masterfully executed puff fold. Patterned pocket squares in particular profit from this elaborate folding technique.

Lay the handkerchief down flat
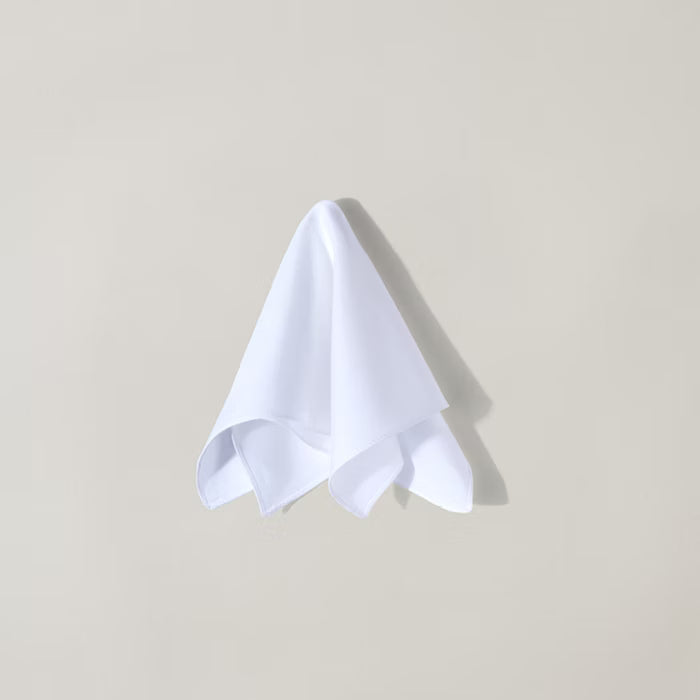
This next step is somewhat tricky. Pinch the middle of the handkerchief between your thumb and index finger and lift it upwards so that the handkerchief hangs down loosely
Now fold the lower end of the handkerchief upwards in order to give your creation a little stability. Don’t forget to puff up the handkerchief a little
Once you have folded the lower end upwards, you can carefully place the pocket square in your breast pocket. Depending on your personal preference, you can also puff the pocket square up a bit more
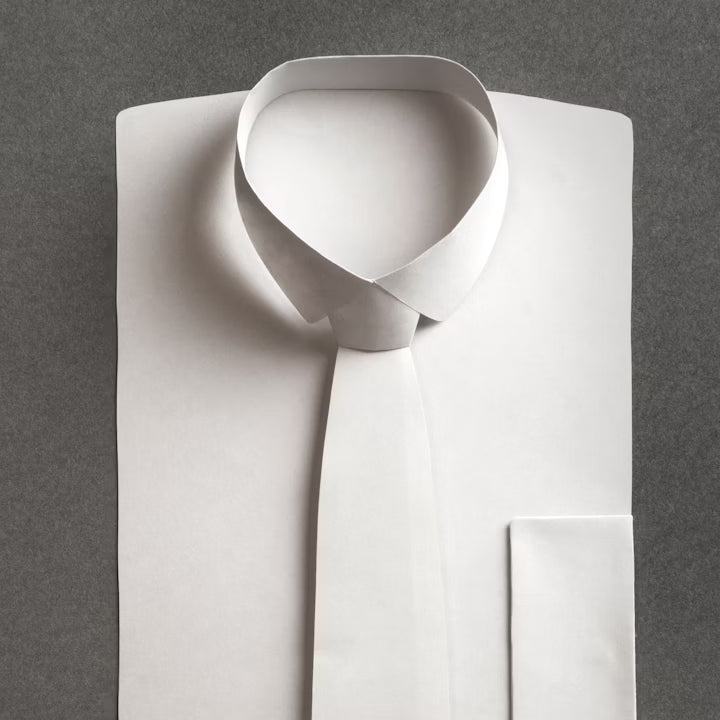
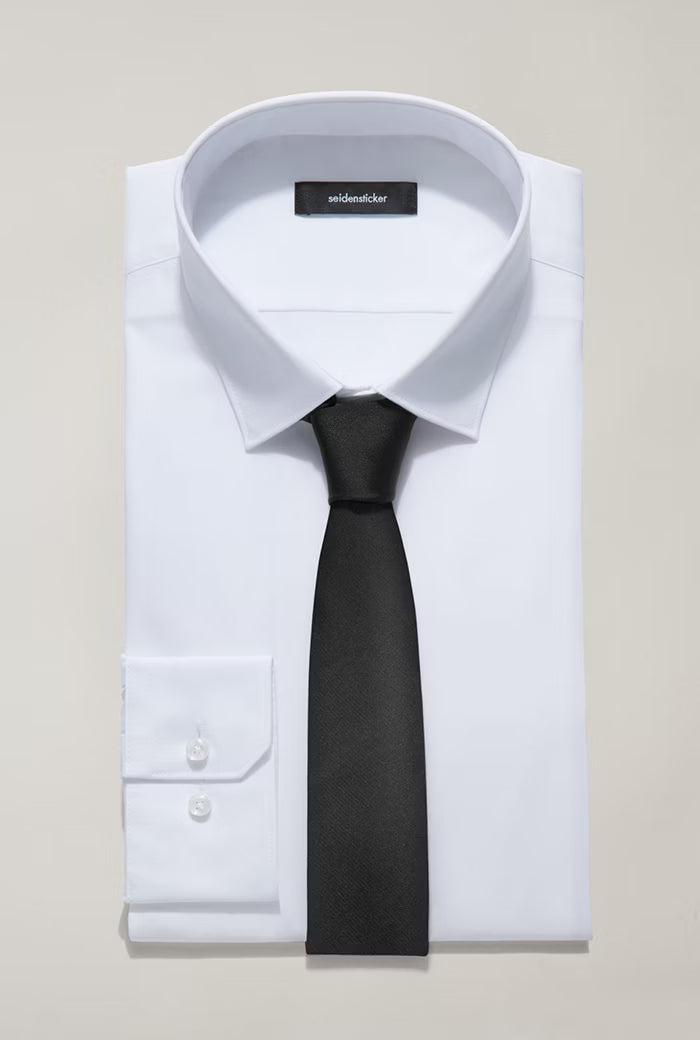
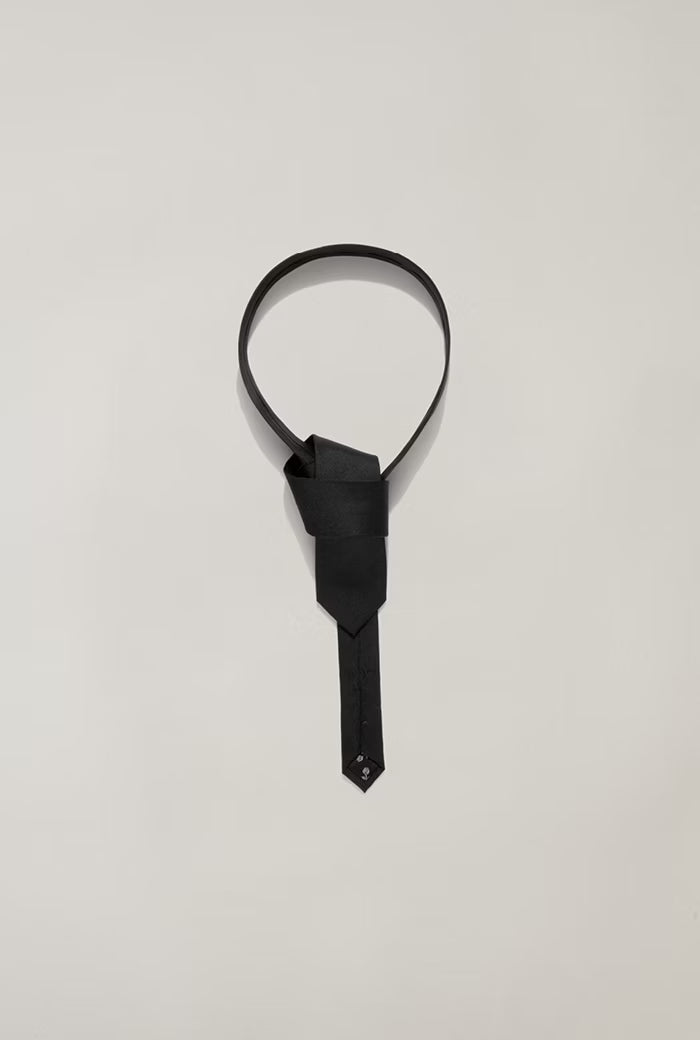
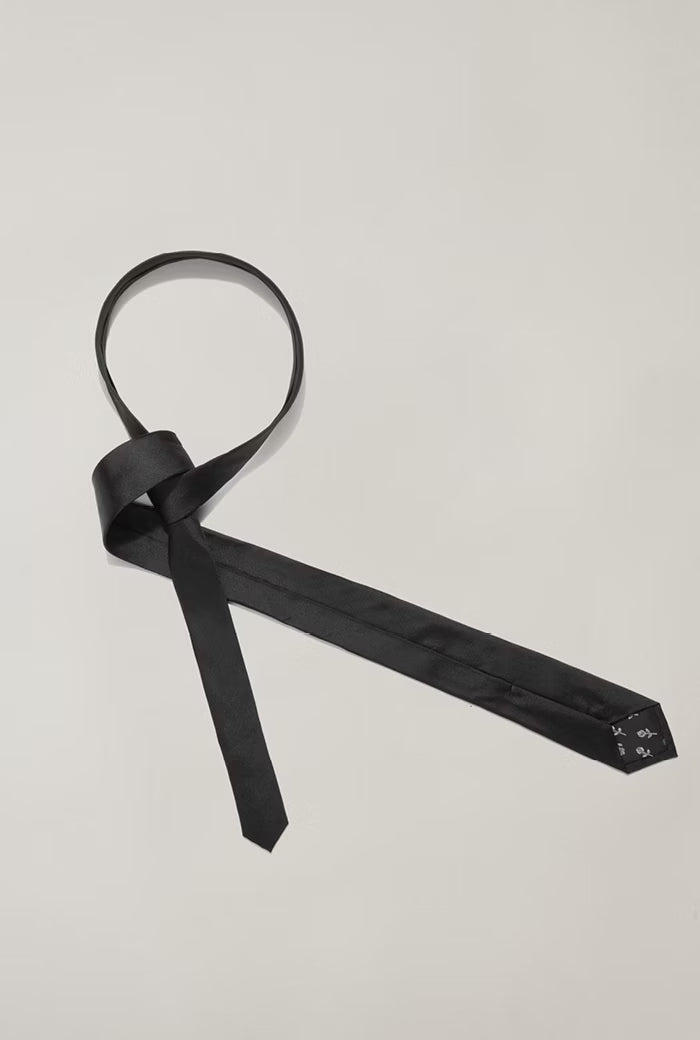
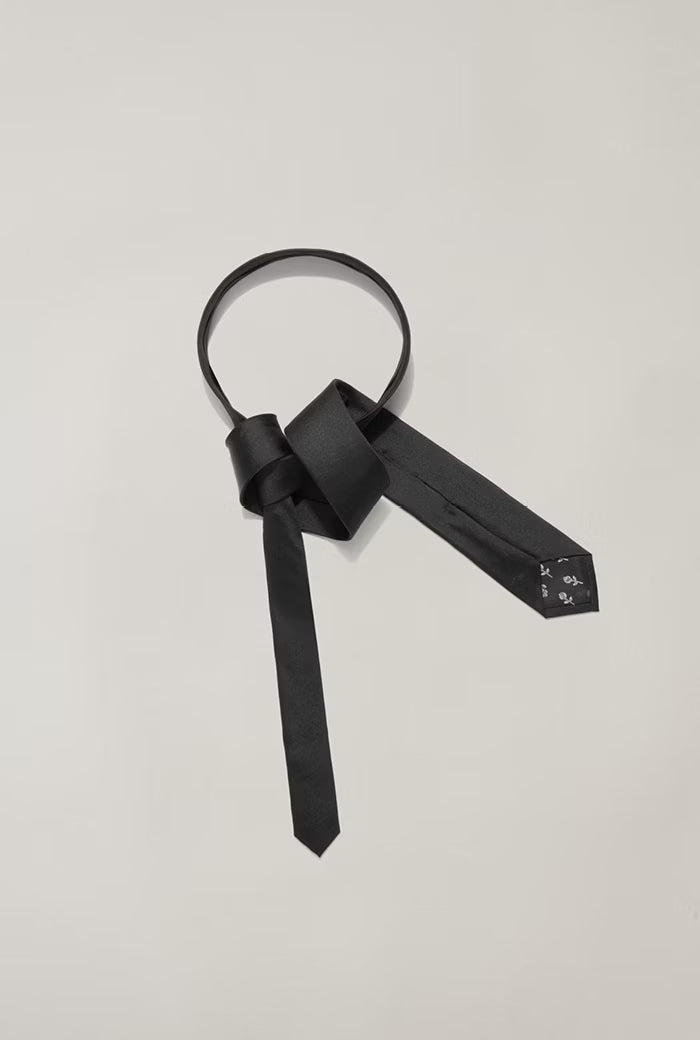
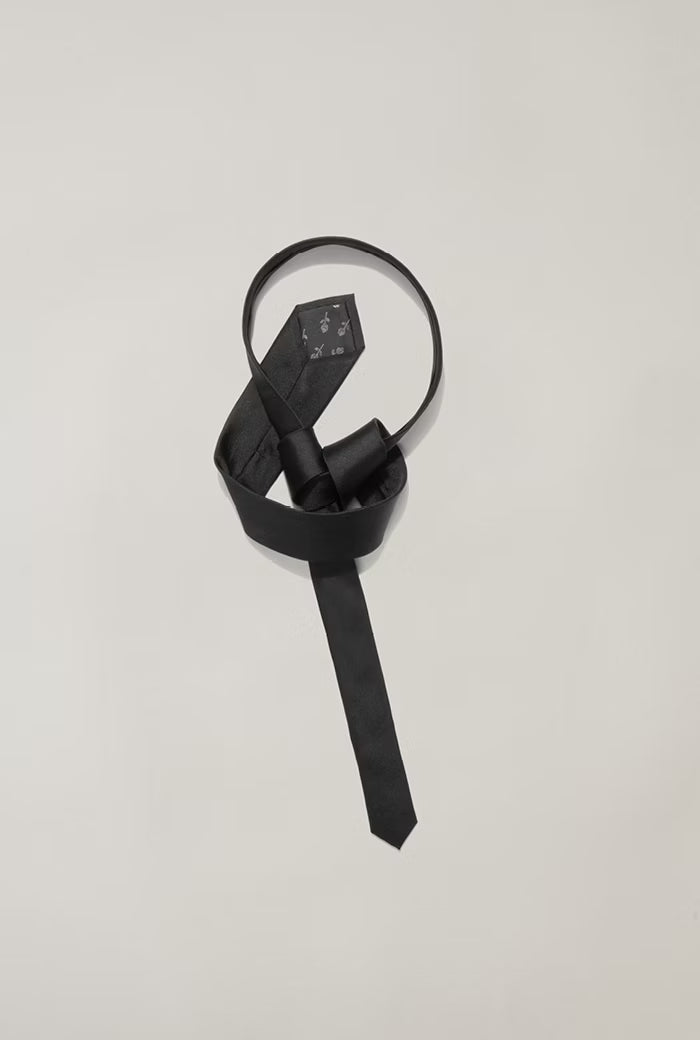
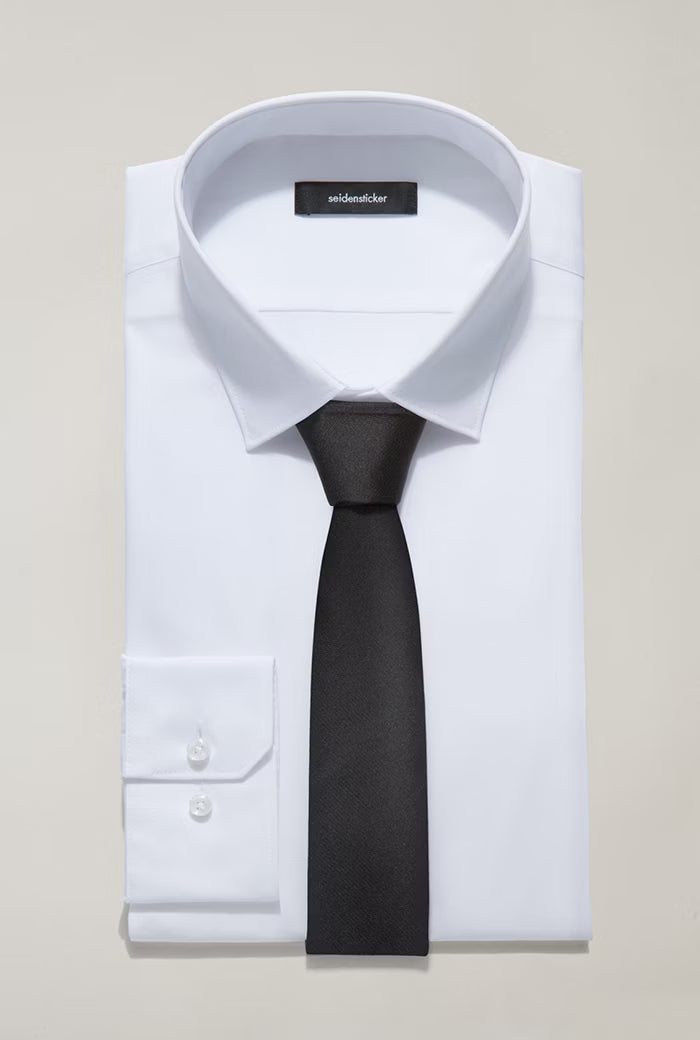
Tying a tie
Whether it’s a Windsor knot, a Pratt knot, a Christensen knot or an Onassis knot – there are countless ways to tie a tie. The perfect look demands that shirt, tie and knot fit together in perfect harmony, creating a consistent overall image. Knowing the right knot to choose depends on a range of criteria. For example, not all types of knots are suitable for all types of shirt collar. The material of the tie also plays an important role. Some tying techniques are better for thicker materials, some for thinner materials. But how do you know when to use which knot and how to tie it?
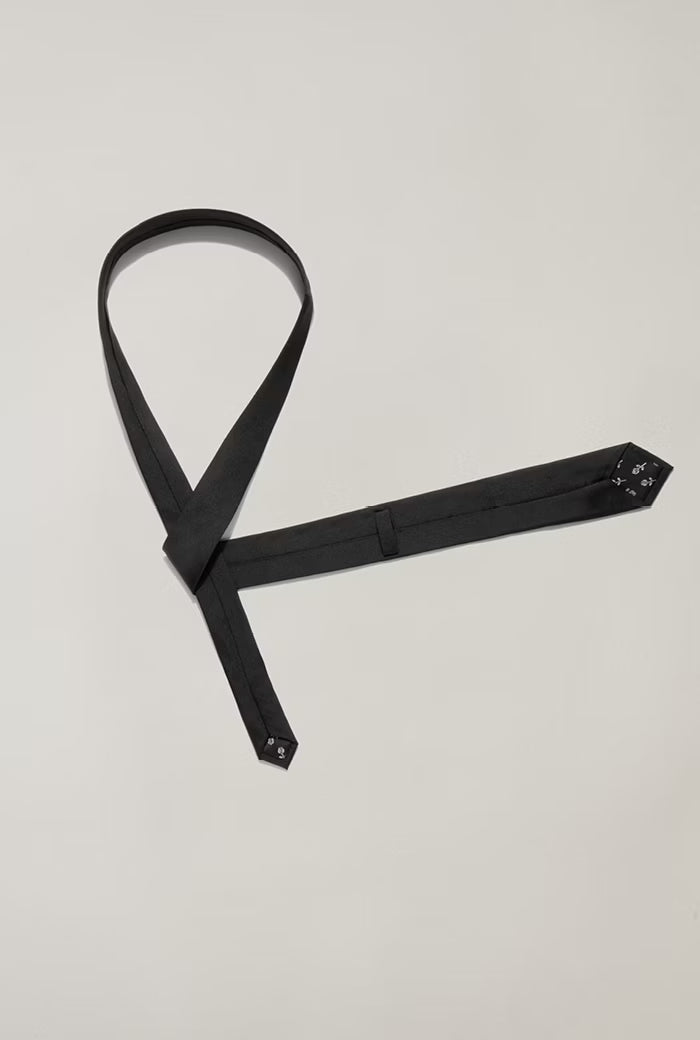
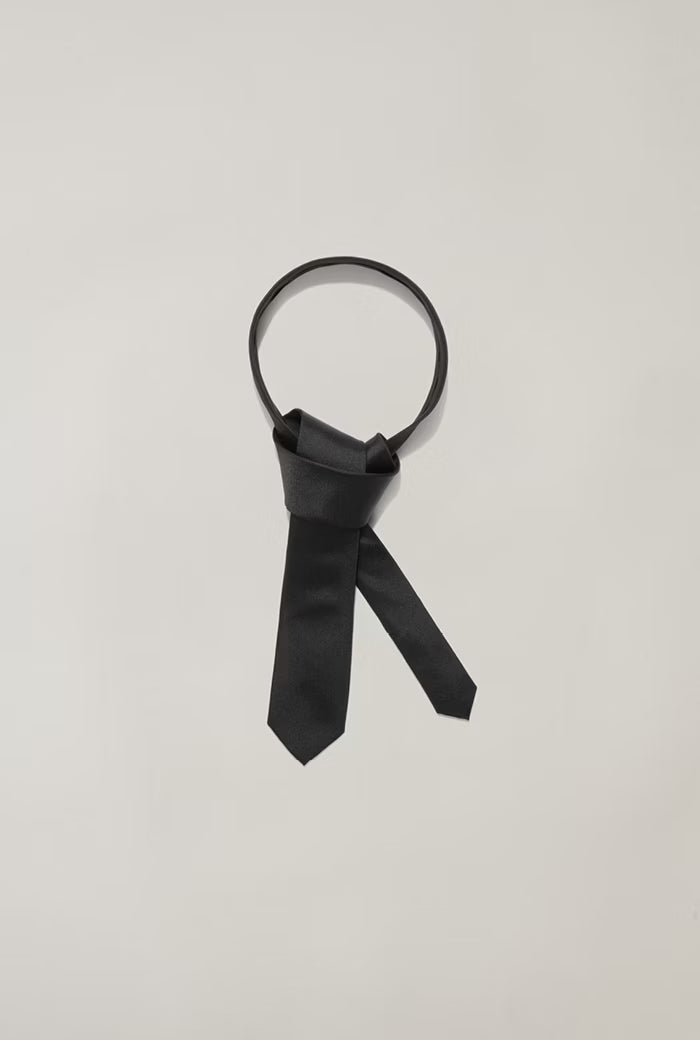
Tying Four-in-hand Knot
The most popular tie knot by far. And for good reason: the four-in-hand knot is quick to tie yet, thanks to its asymmetrical shape, still looks modern and stylish. What’s more, it’s hard to go wrong with a four-in-hand knot. The long, slightly slanted knot is suitable for both narrow and broad ties and suits almost any collar – especially the classic Kent collar.
Place the tie around your neck so that the broad end is to your right. Now guide the broad end of the tie over the narrow end towards your left, keeping it under the collar. Make sure that the broad end is longer than the narrow end
Now guide the broad end under the narrow end towards the right
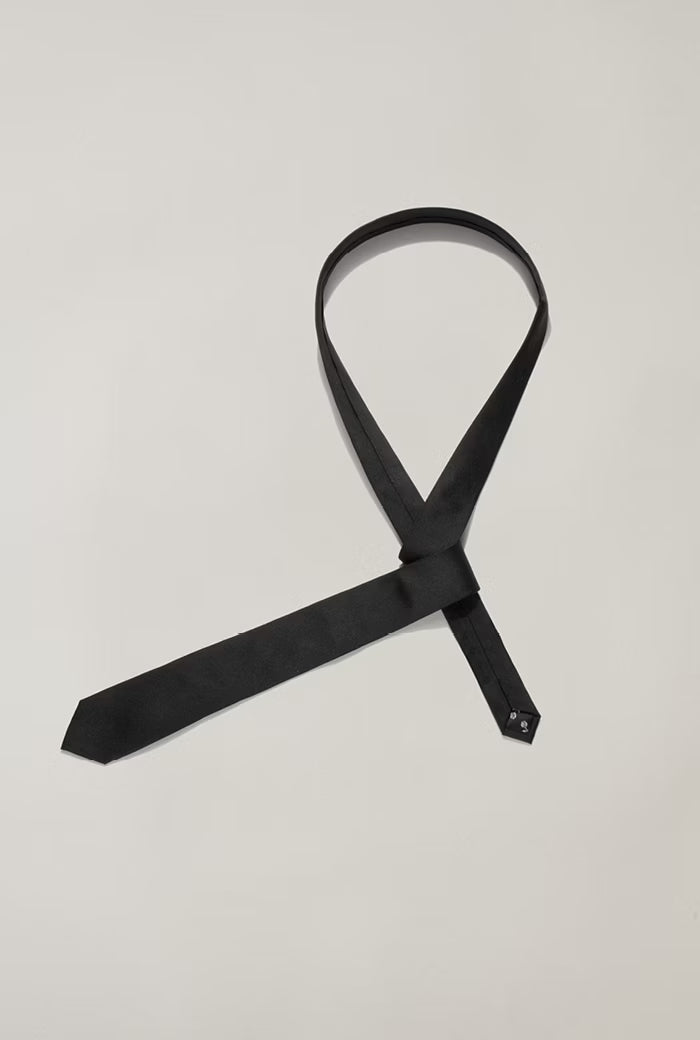
Place the broad end of the tie on top of the narrow end, moving towards the left
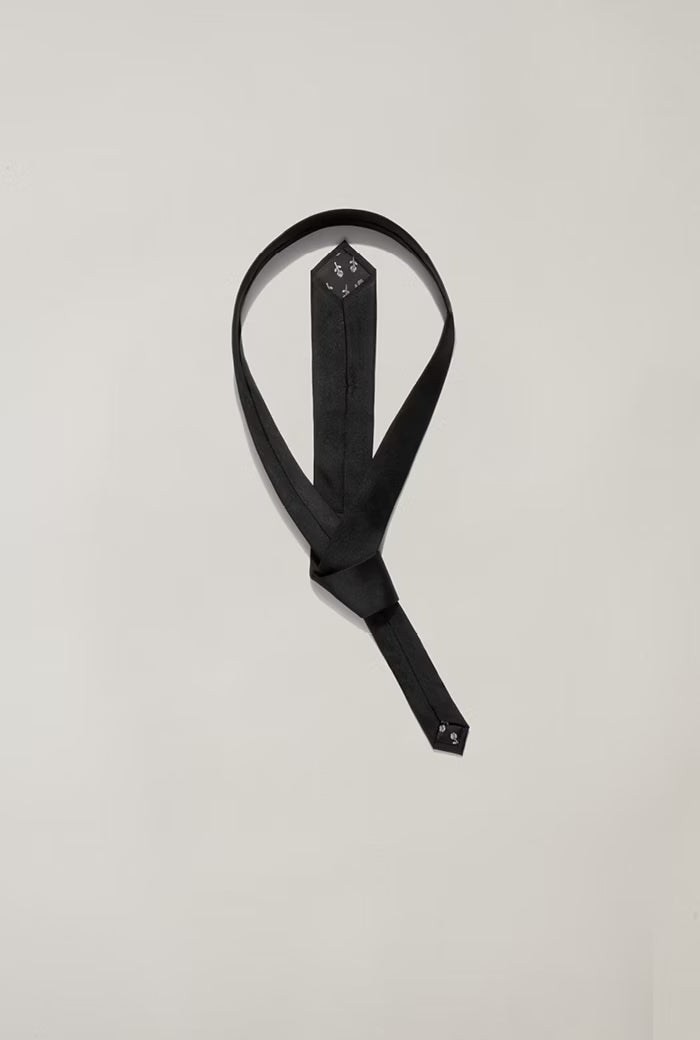
Now thread the broad end through the loop from above
Hold the narrow end of the tie and, using the broad end, carefully pull the loop closed until the knot is secure
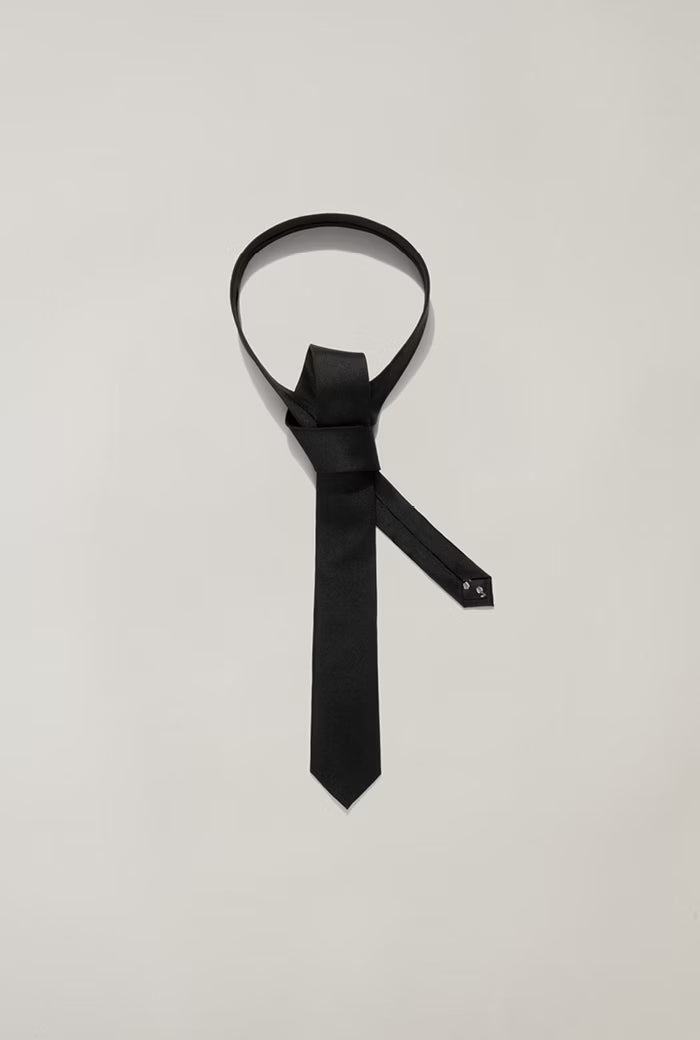
Current practice dictates that the tip of the tie should end just above the waistband
Tying a Windsor Knot
The Windsor knot is opulent, elegant, and gives its wearer a touch of the aristocratic. Seeing as the knot has its roots in English nobility, this is hardly surprising. The Windsor knot is a little more complicated to tie than other knots. However, it is worth the effort. This is because this king among tie knots lends your elegant evening attire that special something. Large collars with a classic, triangular shape are particularly well-suited to narrower ties. For this reason, this knot pairs exceptionally well with Kent collars or shark collars.

Fold up your shirt collar and place the tie around your neck. The broad end of the tie should be slightly longer. Now guide the broad end of the tie to the left, crossing it over the narrow end
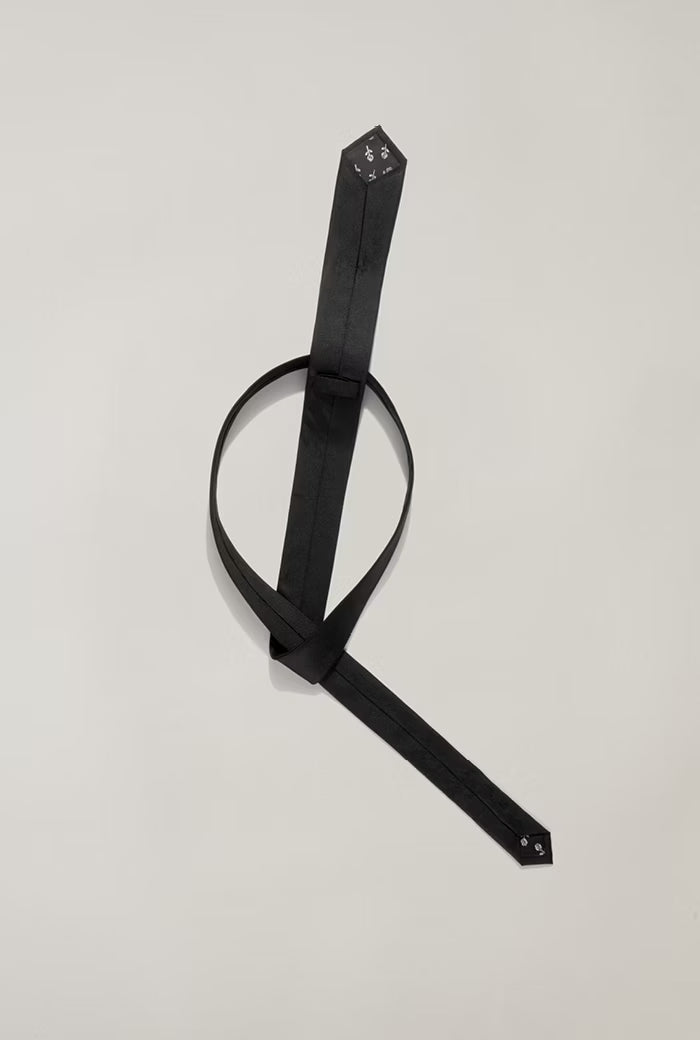
Guide the broad end over the tie and up through the loop around your neck
Make a loop by wrapping the broad end around once again
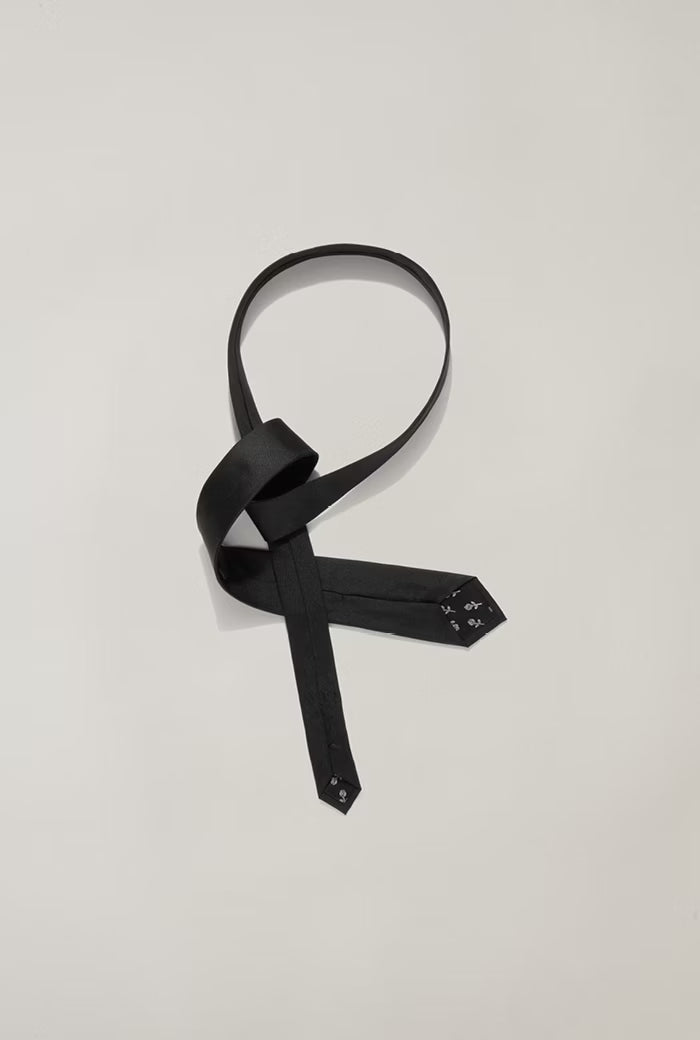
Holding it horizontally, guide the broad end behind the narrow end. Wrap around the tie once and guide the broad end back in front of the narrow end
Loop the tie back up through the neck loop at an angle
Pull the broad end through the loop which this creates. Place the narrow end of the tie through the loop found on the back of the broad end and adjust the knot. In order to be considered to be sitting perfectly, the Windsor knot must sit exactly in the middle of both sides of the collar and cover the top button of the shirt
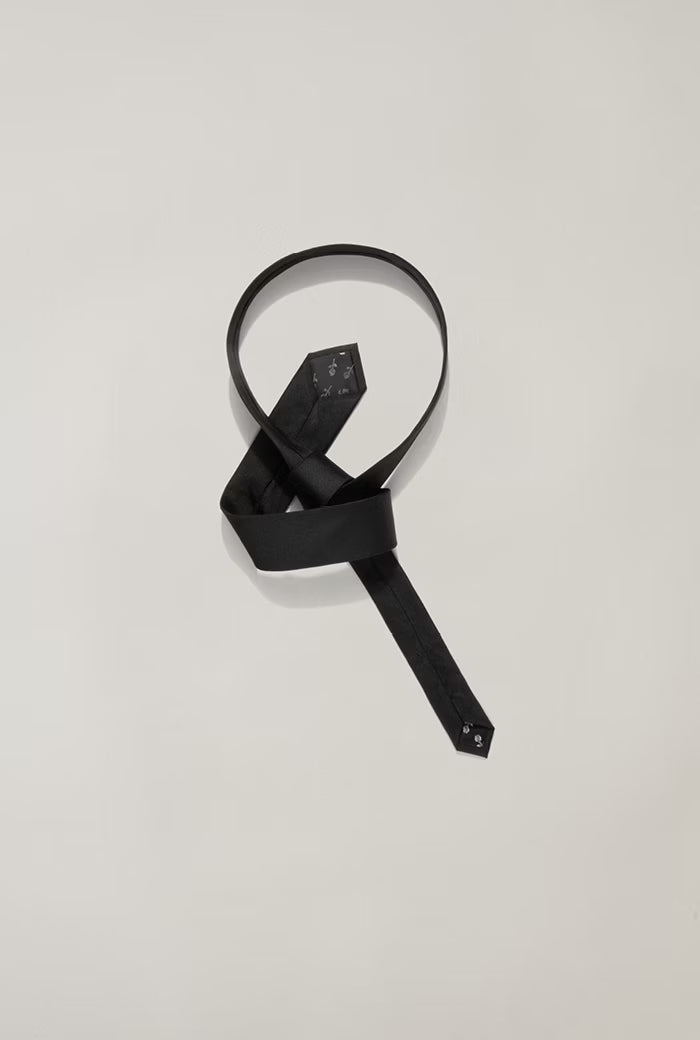
Tying a Double Windsor Knot
The double Windsor knot is named after the Duke of Windsor, who was the first to popularise this specific tie knot. It is ideal for shirts with wide-spread collars, i.e. when the space between a wide-spread collar needs to be filled, as is the case for collars such as Kent collars or shark collars. This tie knot is widely used, but requires a little practice. This makes it a knot which is more suited to people who already have some experience in tying ties. The knot is somewhat larger, which means it is not the best knot of choice for heavily-padded ties. The knot is perfectly triangular in shape.

Using your right hand, guide the broad end of the tie to the left, passing it over the narrow end. Then guide the broad end back to the right, this time passing under the narrow end
Then pull it over the knot towards your body and downwards through the loop. Following this, the broad end should be hanging down towards the right, with its underside facing up
Take hold of the broad end and, carrying it over to the left, wrap it around the half knot. Using your left hand, guide the broad end of the tie upwards along the back side of the knot, taking it through the loop around the neck
Place the tip of the broad end under the outermost layer of the knot
Then pull it through completely, carefully adjusting the knot by gently holding it and pulling on the narrow end of the tie
A tie with a Windsor knot should also end with its broad end approximately level with the waistband